|
|
|
|
 |
Simon the Pi Man
To Infinity (probably) and beyond
(A beginners Resource for the Raspberry Pi computer using the Debian distro)
|
|
If you are looking for info on the Raspberry Pi computer
stay on this site
however
If you are looking for a good cafe in
Rye in
East Sussex try
"Simon the Pie man" near the church.
|
|
| | How2 (General)->6. Web Server with php |
|
How2Setup a web server with php support on your Raspberry Pi
One of a set of simple easy to use guides for beginners to set up a Raspberry Pi
computer.
My thanks go to Mike Montalvo of Digital Tuning inc for his help in improving this
tutorial
I develop applications in a LAMP(Linux Apache Mysql and php) environment so i thought it would
be interesting to provide a php development environment using a Raspberry Pi as a web server.
This instruction sheet will explain how to install lighttpd with php support, to allow the building
of web applications by anyone with a Pi.
The Debian distribution allows the installation of Apache which is my webserver of choice,
however as the Pi has linited memory i thought i would try to set it up with lighttpd which
appears to have a smaller memory footprint than Apache.
1. Firstly I need remote access to my pi so firstly carry out the
How2SetUp Remote Access from the menu on the left.
Lets connect to the Pi remotely using putty so we get the following screen.
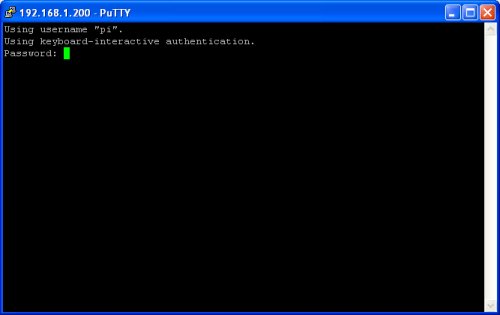
Login using the default user pi and the default password raspberry.
2. Now lets make sure all the system updates from Debian have been applied
pi@raspberrypi:~$ sudo apt-get update
lots of stuff will fly up the screen so wait until finished,
then repeat until nothing else updates - agree y to any y/n questions.
Probably a reboot is a good idea at this time so
pi@raspberrypi:~$ sudo reboot
3. Now we need to create a unix group for the lighttpd web server to use so
pi@raspberrypi:~$ sudo groupadd www-data
4. Now we need to install the lighttpd web server on the Pi so
pi@raspberrypi:~$ sudo apt-get install lighttpd
agree y to Do you want to continue [Y/n]?.
OK lets just test that we have the application installed and that its running
pi@raspberrypi:~$ sudo netstat -na|grep 80
------------------------------------------------------
tcp 0 0 0.0.0.0:80 0.0.0.0:* LISTEN
------------------------------------------------------
The above should be shown, if it isnt then please re-run the steps above from 3.
5. If we see that the Raspberry Pi is listening on port 80 then we can test from a
browser so open a browser on your PC and goto http://[IP Address] where [IP Address] is the address you
you created for your Pi during the setting up remote access process step 1.
and you should see the following displayed in your browser.
------------------------------------------------------
Index of /
Name Last Modified Size Type
Parent Directory/ - Directory
index.lighttpd.html 2012-Jun-02 18:43:51 3.5K text/html
lighttpd/1.4.28
------------------------------------------------------
If you get the above then the lighttpd server has been successfully installed.
6. Right the web server is installed so let us now add the php interface to
the web server using the php common gateway interface installation(php5-cgi).
pi@raspberrypi:~$ sudo apt-get install php5-cgi
agree y to any y/n questions.
7. Once php5 has been installed we need to modify the lighttp server config to
link php files to the php5-cgi.
pi@raspberrypi:~$ sudo vi /etc/lighttpd/lighttpd.conf
In the area marked server.modules we need to add the following highlighted line to the
file
------------------------------------------------------
server.modules = (
"mod_access",
"mod_alias",
"mod_compress",
"mod_redirect",
"mod_fastcgi",
# "mod_rewrite",
)
------------------------------------------------------
And at the bottom of the file we need to add the following text
------------------------------------------------------
fastcgi.server = ( ".php" => ((
"bin-path" => "/usr/bin/php-cgi",
"socket" => "/tmp/php.socket"
)))
------------------------------------------------------
8. Its worth checking your mods were accepted so
pi@raspberrypi:~$ sudo cat /etc/lighttpd/lighttpd.conf|more
And you should be able to see the lines you have added.
9. Next we need to restart lighttpd to ensure that the php-cgi module
is installed.
pi@raspberrypi:~$ sudo service lighttpd restart
This should show
------------------------------------------------------
Stopping web server: lighttpd.
Starting web server: lighttpd.
------------------------------------------------------
10. Lets create a test php file so we can see that the php is installed
and working. Lighttpd uses the /var/www folder as its default path so we need to add
an index.php file to this folder so lets create a file.
pi@raspberrypi:~$ sudo vi /var/www/index.php
In this file we need to insert the following 3 lines for the test.
------------------------------------------------------
<?php
phpinfo();
?>
------------------------------------------------------
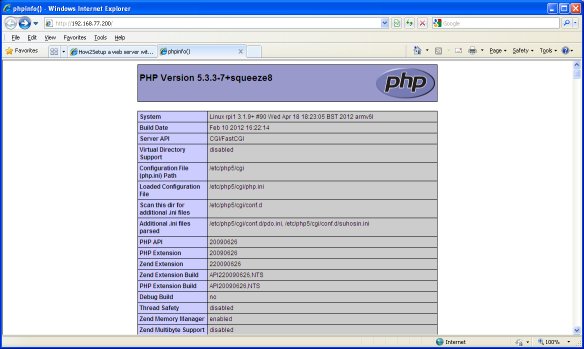
and save the file. This piece of php code will show the configuration of your
php installation.
11. Check you wrote the file correctly.
pi@raspberrypi:~$ sudo ls -l /var/www/index.php
This will show the file properties, and is similar to dir in windows
------------------------------------------------------
-rw-r--r-- 1 root root 21 Jun 4 14:31 index.php
------------------------------------------------------
The 5th column should be about 21(bytes) for the file size.(see our
Beginners Unix Guides - 1 Logging in and files for further explanation)
12. Last step - see if all ok. Open a browser on your PC and goto
http://[IP Address] where [IP Address] is the address you
you created for your Pi during the setting up remote access process step 1.
and you should see a screen as below displayed in your browser - if not check back
through the instructions.
|
|
|
© simonthepiman.com 2012->2026
email: simon@villagenet.co.uk
|
|  | The
Raspberry Pi Foundation is a UK registered charity which exists to promote the
study of computer science and related topics, especially at school level, and to put
the fun back into learning computing.
Please Note:- any mention of the Raspberry Pi computer on these pages refers to the
Raspberry Pi Foundation's product, who also have trademark rights to the term 'Raspberry Pi'.
|
|
|
|