How2Setup a Raspberry Pi console to display on my PC
One of a set of simple easy to use guides for beginners to set up a Raspberry Pi computer.
OK I am fed up going to look at the console of my Pi on a monitor in my
study, so I will explain how you can display the console on your Laptop or PC.
Please NOTE:- I will explain how to connect using Xming perhaps later I will explain
how to use cygwin.
1. You firstly need to download 2 programs
putty - the instructions for downloading are in the
How2Setup Remote access to a Raspberry Pi computer(Please follow all these
instructions as you will need remote access to your Pi anyway - Please NOTE the
Wheezy installer does the ssh(Secure SHell) setting up for you).
Xming which is an X Windows client for a PC, and gives
you access to your Pi in a similar way to Remote Desktop in Windows.
This can be downloaded from
http://sourceforge.net/projects/xming/files/latest/download
but when you go to this page just wait for the download to start, or you will
end up installing a download manager as well.
2. When your file is downloaded, just install it as you would with
any other windows program, defaults are fine.
3. Right we need to setup the Xming config to allow a connection to be
made so lets create an xming connection file - press the Windows [Start] button and
go to [Programs] - [XMing] and click on [Xlaunch].
4. Running this program will show the following screens, choose the
settings i have configured - i will stop you when you need to do something else.
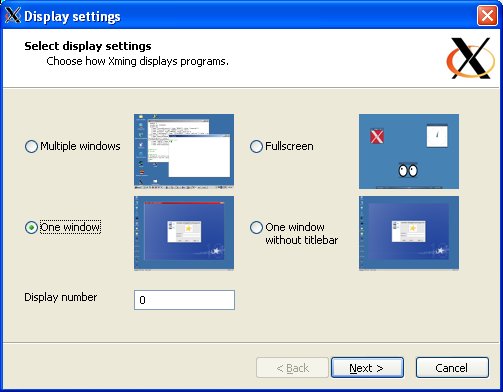
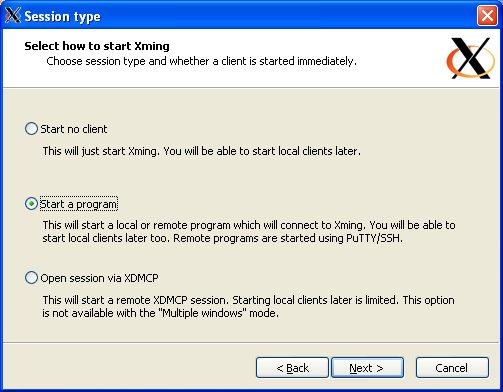
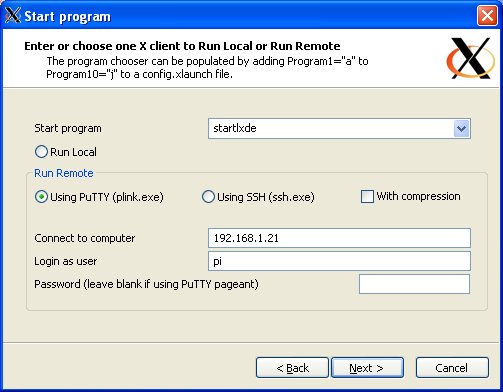
5. Firstly type in startlxde in the [Start Program] field the default is
xterm and this wont do what you need. Then setup the correct I.P. address, username
[pi] and password for your Raspberry Pi . Then somewhere on this page either when
you click on the using putty selection or on pressing [Next] a screen asking for the location of
plink.exe will be shown, just browse to c:\Program Files\putty and click on
plink.exe and then click [OK] or [Save] or whatever is shown, this will then
take you to the next couple of pages.
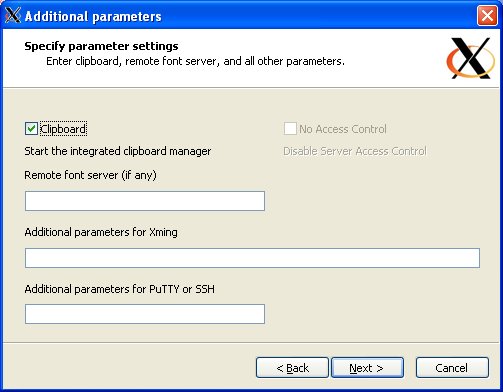
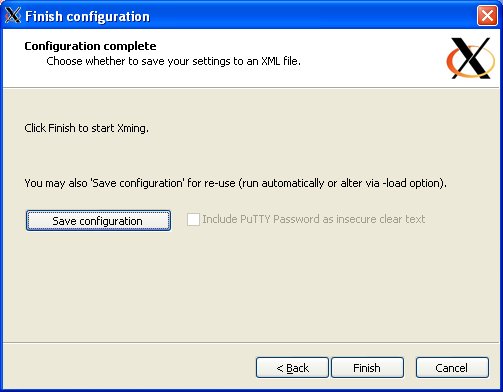
6. Now click on [Save Configuration] and save the file to the Desktop
so you can find it again, then press [Finish].
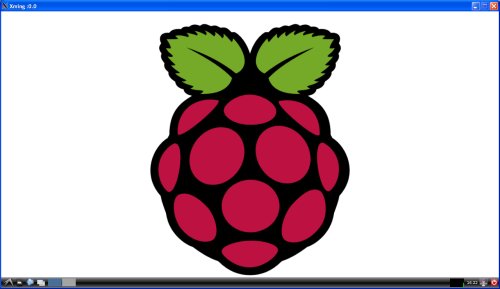
Now be fairly patient as the screen on my PC takes about 30 seconds to display
the Raspberry Pi desktop with a 128Mb/128Mb memory split, or about 50 seconds for
a 224Mb/32Mb memory split machine. You should see the following screen(on a wheezy
build) - yee ha success.
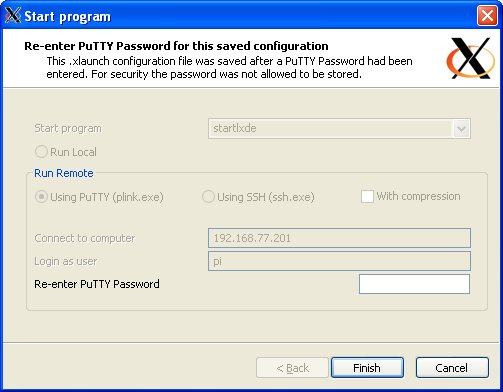
7. If you click on your shortcut you will see the following screen,
and on entering your password and clicking on [Finish] your Pi console from step 6
will appear on your PC.
|
|